
Real Estate Photography Staging: Why It’s Important (Plus Do’s, Don’ts & a Checklist)
Preparing a home before the real estate photographer arrives is one of the smartest steps a Florida real estate agent can take. In today’s market, virtually all buyers start their home search online – listing photos create the crucial first impression. A beautifully staged and photo-ready home not only looks more appealing; it can attract more interest, higher offers, and faster sales. This blog post will cover why staging a listing before a photo shoot is so important, provide key do’s and don’ts for agents and sellers, and offer a handy checklist to ensure any property is picture-perfect on photo day. The tone here is friendly but authoritative – by the end, you’ll see how a little prep work can make your listings shine (and help you rank among Florida’s top agents!).
Why Staging Before a Real Estate Photo Shoot Matters
In a competitive market like Florida, you never get a second chance to make a first impression. Buyers often scroll through listings rapidly, and only the eye-catching homes get a closer look. According to the National Association of Realtors (NAR), 97% of buyers begin their home search online, so the quality of your listing photos can make or break buyer interest. Proper staging ensures your photos stand out. A clean, decluttered, and well-styled home allows buyers to envision themselves in the space, whereas clutter or personal items can turn them off. Just a few hours of cleaning, arranging, and decluttering can lead to beautiful, appealing photographs and a faster sale – don’t leave money on the table by skipping this step!
Well-staged homes tend to sell faster and for more money. Numerous studies back this up. One industry study found that staged homes sell 73% faster on average than unstaged homes. And staging isn’t just about speed; it can affect price. A recent 2025 NAR report revealed that nearly 29% of agents saw a 1%–10% increase in offer price on staged homes, and almost half of agents reported staging reduced the time a home spent on the market. In other words, staging can help you sell quicker and potentially at a premium. It also greatly influences buyers’ perceptions: 83% of buyers’ agents say staging makes it easier for buyers to visualize a property as their future home. The better buyers feel about a home, the more likely they are to schedule a showing and make an offer.
For Florida real estate agents, staging before photos is especially vital. South Florida’s real estate scene, for example, is both fast-paced and image-driven – the first impression often makes the most significant impact in this competitive market. Professional photos of a bright, tidy living room or a resort-like patio can captivate remote buyers (think snowbirds browsing from up north) in ways an empty or messy room never will. And remember, great listing photos don’t just lure online clicks; they motivate in-person visits. Many buyers will decide to visit a property only after liking what they saw in photos. (In fact, one NAR survey noted 63% of buyers will do a drive-by of a home if the listing photos pique their interest.) Simply put, staging is marketing – it’s packaging the home so that the camera can capture its full potential.
Finally, staging ahead of time also streamlines the photography process. When a home is photo-ready on arrival, the photographer can do their job efficiently and capture the best angles without interruptions. If a house isn’t ready, the shoot can be rushed or rescheduled, wasting everyone’s time. By staging beforehand, you ensure the home is ready to “shine” in its best light as soon as the photographer walks in. And as a bonus, a home prepped for photos is essentially prepped for showings, too, killing two birds with one stone. It’s all about setting your listing up for success.
Do’s and Don’ts of Staging for Real Estate Photos
Staging a property for a photo shoot doesn’t have to be overwhelming. There are some clear best practices to follow – and a few pitfalls to avoid. Below are the key do’s and don’ts to keep in mind when preparing a listing for real estate photography. Following these guidelines will help ensure the home looks its absolute best for the camera (and for potential buyers scrolling through Zillow!).
Staging Do’s
-
Do start with a deep clean and declutter. A spotless, clutter-free home is essential for great photos. Encourage sellers to clean the entire house thoroughly – vacuum carpets, mop floors, dust furniture, and wash the windows. Decluttering is equally important: less is more when it comes to staging for photos. Clear off countertops and surfaces, pare down knick-knacks, and tidy up shelves. A clean and decluttered home appears well-maintained and spacious, which boosts buyer confidence. (Pro tip: have sellers pack away personal collections and any items they don’t need daily – it’s a head-start on moving and makes rooms look larger.)
-
Do depersonalize the space. Buyers should be able to imagine their life in the home, which is hard if they’re staring at the current owner’s family portraits and bold décor choices. Kindly ask sellers to remove personal photographs and replace them with neutral art or leave the walls blank. Hide personal items like toothbrushes, laundry, and kids’ artwork. The goal is a neutral, universally appealing canvas – think model home vibes rather than lived-in clutter. This doesn’t mean sterile or empty; a few tasteful accents are great. But put away anything overly specific or personal. As one staging expert puts it, home staging “at its core is a marketing tool to help package a home for sale”, so present the home like a product on display.
-
Do focus on key rooms and focal points. Not every inch of the house needs elaborate staging, but certain areas deserve extra attention. The living room, primary bedroom, and kitchen are top priorities since buyers care most about these spaces. Make sure the living area looks inviting with an attractive furniture layout (arrange seating to highlight space and flow) and maybe a pop of color in a throw pillow or two. In the master bedroom, dress the bed nicely (crisp linens, fluffed pillows) and clear away clutter on nightstands. Kitchens should have spotless counters – hide the dish rack, soap, and fridge magnets, and perhaps leave just a bowl of fresh fruit or a stylish coffee maker as an accent. Remember, in photos, “less is more,” but not zero – a bit of tasteful décor (like a vase of flowers on the dining table) can add warmth. Highlight the home’s best features in each room. If there’s a stunning fireplace or a killer view, stage around it so it stands out.
-
Do maximize light and brightness. Bright homes tend to photograph better. Open all the curtains and blinds to let in Florida’s beautiful natural light. Unless your photographer instructs otherwise, it’s usually a good idea to turn on all interior lights too – lamps, overhead fixtures, everything. This makes rooms look warm and inviting in photos. (Just double-check all bulbs are working and replace any that are burnt out or dim ahead of time.) Light-filled spaces feel larger and more welcoming, and the camera will capture that. As one photography guide notes, turning the lights on makes a huge difference in the presentation of your images. The combination of natural sunlight and interior lighting can help eliminate shadows and give photos a crisp, vibrant look.
-
Do pay attention to curb appeal and exterior staging. The outside of the home is just as important as the inside when it comes to first impressions. Make sure the yard is tidy – mow the lawn, trim overgrown bushes, rake leaves, and add fresh mulch to flower beds if needed. Remove any eyesores like garbage cans, garden hoses, tools, or kids’ toys from the front and back yards. A clean driveway and an uncluttered front entrance do wonders in photos. In Florida, many buyers are drawn to outdoor living spaces, so stage the patio or pool area with inviting touches: clean the patio furniture, arrange some plush cushions, and maybe set out a couple of potted plants or flowers for a pop of color. Little details like a swept front porch, a new welcome mat, or some tropical plants by the door can make the property feel welcoming even before stepping inside. (And don’t forget to close all the garage doors for the photos, as open garages rarely photograph well!)
-
Do make minor fixes and final touches. Before the shoot, walk through the home with a “buyer’s eye” and address anything that might catch the camera’s attention in a bad way. Replace any burned-out light bulbs, tighten loose cabinet handles, and touch up any small wall scuffs or paint chips if possible. These little fixes can prevent flaws from showing up in ultra-sharp, high-resolution photos. Also, double-check everything is photo-ready: toilet seats down, ceiling fans off, blinds evenly adjusted, and no clutter peeking out (for example, tuck trash cans and laundry baskets out of sight). By handling these details, you’re ensuring nothing distracts from the home’s beauty in the images.
-
Do communicate and plan. Staging for photos is a team effort between the agent, the seller, and sometimes professional stagers or the photographer. Encourage your sellers to start preparing a few days in advance so they’re not rushed on photo day. Provide them with guidance or even a pre-shoot checklist – many real estate photographers (and companies like ours) have handy prep lists you can share to help owners get their home ready. If the home will be professionally staged, schedule that service before the photographer arrives. And if you, as the agent, have specific shots in mind (say, highlighting a renovated kitchen or a great view at sunset), discuss it with your photographer ahead of time. Planning and coordinating early will ensure a smooth shoot with stellar results.
Staging Don’ts
-
Don’t assume “the camera will hide it.” If something looks off in person, it will likely look off in the photos, or even worse. Dirt, clutter, and disarray are not problems you want to “fix in Photoshop.” Avoid leaving any messes or eyesores in the hope that the photographer can just edit them out later. While minor blemishes can sometimes be touched up, major clutter or grime will show up and turn off buyers. For example, don’t leave dishes in the sink, laundry on the floor, or overflowing trash bins visible – those details can make an otherwise lovely kitchen or living room look unappealing. A good rule of thumb: if it’s not meant to be part of the scene, get it out of the shot (preferably before the photographer arrives). A clean, well-staged room requires minimal post-processing and yields the most authentic, attractive images.
-
Don’t leave personal items and clutter visible. This might sound like a repeat of the “do declutter” rule, but it’s worth emphasizing from the opposite angle. Common staging mistakes include leaving family photos, children’s toys, piles of mail, or personal collections on display. These not only distract buyers but can also inadvertently reveal personal information. For instance, a bulletin board full of letters or a fridge covered in school schedules shouldn’t end up immortalized in listing photos. Store away anything uniquely personal or messy – clear the fridge door, hide the pet food bowls, put toiletries in a drawer, and ensure dirty laundry (and even hampers) are out of sight. The home should look like a product on the market, not someone’s lived-in space. Don’t worry about the home feeling a bit “empty” or impersonal; in photos it will translate as clean and spacious, which is exactly what you want.
-
Don’t neglect the exterior of the home. We’ve said it once, but it bears repeating: the outside needs love, too, especially in photographs. Don’t allow the front yard to be an afterthought. Things like garbage cans left at the curb, messy yard tools out, or cars parked in the driveway can significantly detract from an otherwise great exterior shot. Ensure the driveway and curb are clear – for example, if it’s trash day, reschedule the shoot or have the bins tucked away. Don’t forget to remove seasonal eyesores as well (dead plants, holiday decorations that are past their time, etc.). A pro tip: step across the street and glance back at the house – whatever grabs your attention (good or bad) will grab the camera’s attention too. If the welcome mat is old or the porch light is out, take care of it. Curb appeal matters, and a buyer’s first click might be on that gorgeous twilight exterior shot, not on a cluttered front yard.
-
Don’t keep pets (or evidence of pets) around during the shoot. We all adore our furry friends, but they can be a wild card on photo day. Do not leave pets roaming the house when the photographer arrives. At best, a dog or cat might end up appearing as an unwitting blur in a photo, and at worst, they could be a distraction or even a hazard (imagine the photographer tripping over a curious cat!). Arrange for pets to be out of the house, if possible – maybe a walk with the owner or a playdate at a neighbor’s during the shoot. At minimum, confine them to an area that won’t be photographed. Also, remove pet-related items from view: litter boxes, pet beds, bowls, and toys should all be tucked away. You don’t want a potential buyer’s first impression to include Fido’s chew toys on the living room floor. Not only can pet items make a room look untidy, but some buyers might assume pet odors or damage (even if none exist). Bottom line: for the purposes of the photo shoot, pretend the pets don’t exist in the home. It will make for cleaner images and avoid any issues.
-
Don’t expect the photographer to stage or clean. This is a big one. As the agent or homeowner, it’s your responsibility to have the home photo-ready – the photographer is there to capture, not to tidy up. It’s unprofessional to put a photographer in the position of having to move clutter or clean a mess on site. Many real estate photographers have policies that explicitly state they will not move furniture, personal items, or perform staging due to liability concerns. Don’t assume “oh, the photographer can just hide that trash can” or “they’ll photoshop out those cords.” They might do small adjustments, but counting on that is risky. It’s far better to handle those issues beforehand. Make sure the home is ready to shoot at the scheduled time, so the photographer can focus on lighting, composition, and showcasing the property, not shoving clutter out of frame. By respecting the photographer’s role and prepping the home in advance, you’ll get the best possible photos (and you’ll build a great working relationship with your photographer, too!).
Real Estate Photography Staging Checklist for Agents and Sellers
Now that we’ve covered the principles, let’s get down to specifics. Below is a room-by-room staging checklist you or your homeowner can use before the photographer arrives. This “real estate photography checklist” hits all the major points to ensure the property is looking its finest. Feel free to print it out or share it with your sellers as photo day approaches. A well-prepared home will make the photo shoot quicker and the resulting images stunning!
-
Whole Home – Overall: Clean every room thoroughly and declutter all spaces. Vacuum carpets, mop hard floors, wipe down countertops, and clean the windows to let in maximum light. Remove or neatly store everyday clutter – magazines, remote controls, toys, etc. – to create open space. Depersonalize by taking down family photos, personal certificates, and anything with names or faces. The goal is a neat, neutral environment that appeals to any buyer. Also, check that all light bulbs are working and use consistent bulb types (matching color temperature) within each fixture for an even look.
-
Exterior & Curb Appeal: Step outside and view the home from the street – this is your money shot for curb appeal. Mow the lawn and trim landscaping for a well-kept look. Remove any vehicles from the driveway (and don’t park directly in front of the house either). Hide trash cans, recycling bins, garden tools, hoses, and toys – nothing should distract from the home’s facade. If your shoot is near a holiday, consider toning down decorations (e.g., a simple wreath instead of an entire holiday display). Sweep driveways and walkways; if there’s mildew or dirt, a quick power-wash of the front steps or siding can help. Finally, make the entryway inviting: a fresh doormat, a potted plant, or a seasonal wreath can add a nice touch. (And yes, ensure the garage door is closed and any clutter inside the garage isn’t visible from outside.) A clean, welcoming exterior tells buyers that the home is cared for – and it will look fantastic in wide-angle shots.
-
Outdoor Living Areas: In Florida especially, buyers love outdoor spaces, so give these some attention. If the home has a patio, deck, or pool, stage it like an outdoor oasis. Arrange patio furniture neatly (clean any dust or pollen off of it) and consider adding a few accents like outdoor cushions or a decorative lantern. Remove any pool covers, pool cleaning tools, or toys – the pool should be clean and sparkling if it’s in season. For backyard photos, coil up garden hoses and put away any sports equipment or pet messes. Adding a pop of greenery or color can help: a couple of potted palms or some flowering plants can make the space more vibrant. Remember, you want to sell the Florida lifestyle, so showcase that grill or fire pit area as clean and ready for a barbecue, and make the screened porch look like the perfect place to relax on a summer evening.
-
Entryway and Foyer: This sets the stage when buyers first walk in (and it’s often captured in photos looking into the home). Remove clutter like shoes, coats, mail, and keys from entry tables or hooks. If there’s a rug that crowds the space, consider removing it to show off the flooring (small rugs can chop up the visual flow). A simple, clear entryway with perhaps a neat console table or a mirror will make the space feel larger and more welcoming in photos. Turn on any foyer light fixtures to add warmth. Essentially, you want the entry to feel open and tidy – it’s the first interior shot buyers may see.
-
Living Room / Family Room: Stage the living areas to look comfortable yet uncluttered. Remove any piles of magazines, mail, or children’s toys. If you have a lot of family photos or bold personal decor, swap in some neutral decorative pieces (think simple artwork or a mirror above the mantle). Arrange furniture in a pleasing layout – no pieces blocking doorways or cutting off the flow. Fluff and arrange throw pillows on sofas and chairs for a cozy touch. Make sure the coffee table is clear or tastefully styled (a single vase of flowers or a couple of books is fine, but no remotes, coasters, or clutter). Hide visible cables and wires from electronics as best as you can, and turn off any TVs or computer screens. If there’s a fireplace, clean out any ash and display it nicely (you can stage with logs or candles inside if it looks empty). The living room should look like a place to relax and entertain, with lots of floor space visible and a clear focal point (like a fireplace or a view out a window).
-
Kitchen & Dining Area: Kitchens should be sparkling clean and minimal. Clear all countertops of non-essential items – this means toasters, knife blocks, spice racks, etc., should be put away if possible. (You can leave one or two attractive items, like a coffee maker or a bowl of fruit, to avoid the counters looking completely barren.) Remove any dish rags, sponges, soaps, and cleaning products from the sink area. No dirty dishes in sight – all dishes should be cleaned and put away, and yes, the sink should be empty and shiny. Also clear the front of the refrigerator of magnets, photos, and papers, so it looks sleek. In the dining area, clear and center the dining table. A simple centerpiece like a vase of flowers or an elegant place setting can make it look inviting, but make sure it’s not overly fussy. Straighten all chairs and space them evenly around the table. If you have extra leaves in the table, making it too large for the space, consider removing them to scale the table down. Essentially, the kitchen and dining should look like a showroom: gleaming surfaces, no clutter, and a touch of hominess (like that bowl of lemons or plate of cookies) to give it life.
-
Bedrooms: Master and secondary bedrooms should feel restful and spacious. Start with the beds: have them made neatly with crisp linens and plumped pillows. Ideally use neutral bedding if available, and add a few decorative pillows or a throw to add color and texture. Ensure any bed skirts or sheets aren’t dragging messily on the floor – tuck edges in neatly for a polished look. Clear off nightstands except for maybe one nice lamp or a small decor item (like a book or plant). Hide personal items like phone chargers, medication bottles, jewelry boxes, etc., out of sight. If there’s a TV in the room, it’s fine, just have it off for the photos (no glaring screens). Declutter closets enough that they aren’t overflowing if the doors will be open in photos (usually closed closet doors are fine for the shoot unless it’s a walk-in you want to showcase – in which case, organize it neatly). Also, remove any clutter from under the bed that might show in the photos (photographers sometimes take low-angle shots). In kids’ rooms, try to organize or minimize toys – a few cute items arranged nicely are okay, but stash the bulk of the toys and any laundry or school clutter. All bedrooms should feel calm, clean, and roomy.
-
Bathrooms: Think hotel chic for bathrooms – spotless and elegant. Clear off all countertops and surfaces; that means no toothpaste tubes, razors, hairbrushes, or makeup bags left out. You can leave a decorative soap dispenser or a candle for a homey touch, but nothing that looks personal or messy. Remove all toothbrushes, shampoos, body washes, and loofahs from the shower and tub area (store them under the sink temporarily). Make sure toilet lids are down in every bathroom. It’s best to take away floor mats and scatter rugs for the photos – they often look visually cluttered and can make the room seem smaller (plus, they can harbor stains). Hang fresh, clean matching towels neatly on the towel bars – consider using white or a color that matches the bathroom decor for a uniform look. And of course, clean like crazy: no toothpaste splatters on the mirror, no mildew in the grout, no water stains on the faucet. A shiny, clean bathroom with maybe a small plant or a folded towel set will read as spa-like in photos, which is exactly what you want.
-
Home Office / Bonus Rooms: For any extra spaces like an office, den, or game room, apply the same principles: declutter, organize, and define the purpose of the room. In a home office, clear the desk of excess papers (hide those stacks of files!), and secure private documents out of sight. A laptop, a neat pen holder, and maybe a plant can remain as staging. Coil up any visible cords as much as possible and hide power strips. Bookshelves should be tidied – straighten books and remove overly personal or odd items. If the space is a multi-use room, decide on what to highlight (for example, a combo guest-room/office should have the bed made and the desk area pristine to show both uses). The key is to show the room’s potential without confusing clutter. Make it easy for buyers to see “Oh, this could be my work-from-home space or my hobby room,” without the distraction of the current owner’s stuff.
-
Pets: As mentioned in the Don’ts, pets should ideally be out of the house during the photo shoot. Before leaving with them, do a sweep to remove all pet evidence. That means pet beds, crates, toys, food and water bowls, leashes, etc., should be stashed away. Lint-roll or vacuum any pet hair on furniture (that fur really shows up in high-res photos!). If there are any pet odors, address them – a deep clean or an air purifier can help neutralize smells. Check the yard for any “surprises” and remove pet waste. Essentially, pretend no pets live there. This not only makes the home look cleaner in photos but also prevents turning off buyers who may worry about allergies or damage. (And of course, ensure Fluffy or Fido is somewhere safe and comfy while the photographer is working – you don’t want a curious cat photobombing the shoot from a windowsill!)
-
Final Walk-Through: Once everything is staged and ready, do a final walk-through of the entire property about 15-30 minutes before the photographer arrives. Turn on all the lights (and double-check under-cabinet lights, oven lights, closet lights – any light that adds ambiance). Open all curtains and blinds to let in natural light (unless a particular view is undesirable – in that case, you can angle the blinds to block, but generally more light is better). Ensure ceiling fans are off (motion blur in photos is not good). Tuck away any last-minute items like phone chargers, personal devices, or stray clutter that might have crept back. This is your chance to see it as the camera will. Everything looking good? Great – you’re set! Now step back and let the photographer work their magic, capturing the beautifully staged home.
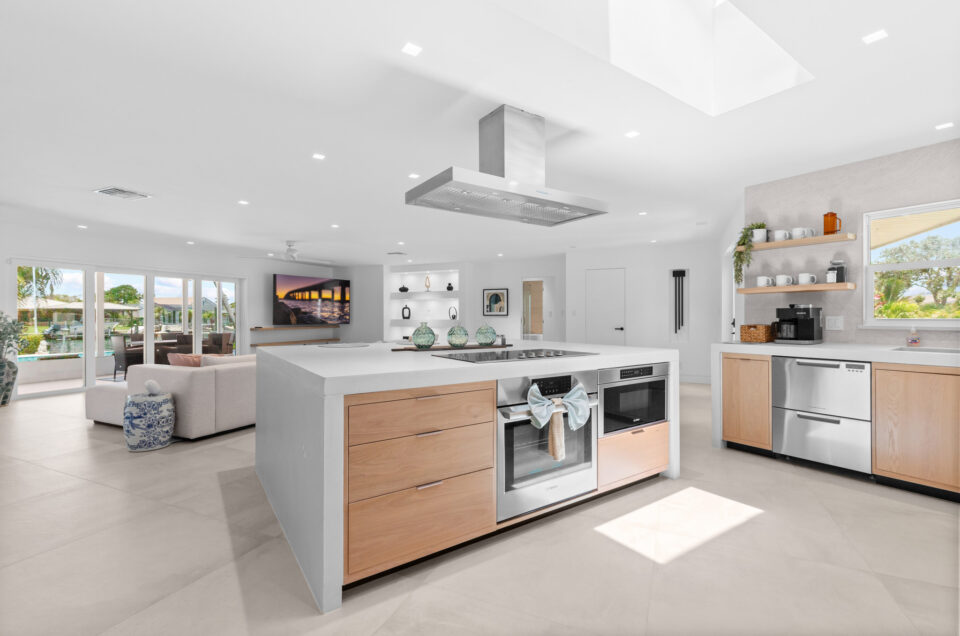
Turning on all interior lights can significantly enhance the brightness and warmth of a space in listing photos. Even in sun-filled Florida homes, interior lighting adds a welcoming glow and ensures no corner looks dark. As shown above, a room with lights on appears more inviting than one with lights off. Buyers scrolling through listings are drawn to bright, vibrant images, so don’t hesitate to flip on every light switch before the shoot. The combination of ample lighting and thoughtful staging will make your listing photos truly stand out.
Don’t let something as simple as a trash bin spoil your curb appeal. Before the photoshoot, remove any garbage cans, recycling bins, or clutter from the front of the house to give it a clean, unobstructed look. In the example above, the front exterior appears much tidier and more attractive once the bins are out of sight. Little details like this have a big impact on the overall presentation. Excellent curb appeal in photos sets the expectation for the rest of the home and entices buyers to come see it in person – a critical factor in Florida’s competitive market.
Bathrooms should be pristine and free of personal toiletries during a photo shoot. Take the time to clear countertops of items like toothbrushes, soaps, and cosmetics, and ensure towels are neatly hung or removed. In the comparison above, removing clutter and straightening towels transforms the bathroom into a spa-like space that feels fresh and inviting. Buyers will focus on the updated fixtures and the cleanliness, rather than being distracted by personal items. This level of attention to detail in staging can make a big difference in how upscale and appealing a home appears in its listing photos.
Staging a listing before a real estate photography session is well worth the effort. By following these do’s and don’ts and using the checklist above, Florida real estate agents can significantly improve how their listings look online – which means more clicks, more showings, and ultimately, happier clients. Homes that are clean, decluttered, and thoughtfully staged create an emotional connection with buyers, allowing the property’s best features to shine through the photographs. And as the data shows, that can lead to faster sales at higher prices.
In the end, effective real estate photography staging is all about teamwork and preparation. The agent and homeowner handle the prep work, and the photographer handles the artistry of capturing it. When each does their part, the result is a set of stunning listing photos that make your property pop off the screen. So before your next listing shoot, take a little time to stage and prep – you’ll be glad you did when you see the picture-perfect results. Here’s to selling those homes faster and for top dollar with the power of beautiful photography and smart staging! Good luck, and happy selling!

You might also like

Leave a reply